The Magnificent Swallowtail Kite

made in USA
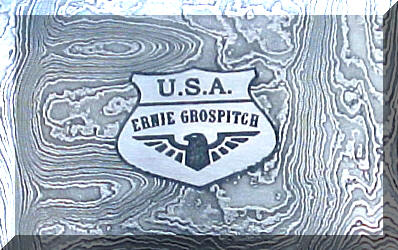
KnifeMaker Fingerprint 1 KnifeMaker Fingerprint 2 KnifeMaker Fingerprint 3
Customer's Personal Stencil Addition
Blue Lightning Tips Etch your Logo into Damascus Etching Power Supply
Blue Lightning Stencil: Price List
Lockback Folders Bowies page 1 Bowies page 2
Tutorials Links Stabilized Leather Moose Antler Stabilize
How to etch your Logo into your knife
HARD Felt Knife Honing Wheel Leather Stamp Custom Logo
Contact via email: shrpknife@aol.com
Benefits for following these steps:
This can easily be cut in half by changing the secondary output
lead you use off the transformer or by adding a potentiometer in the output.
The potentiometer would make your output controllable to
The top of the line for Knifemakers is to be able to check what the logo will look like
where they want to put it by looking through the clear Logo Guide.
You can use the Logo Guide to just checkout your logo positioning.
The added benefit is that you can use it to place the logo stencil exactly where you want to place it.
The steps below help you to etch your logo into Damascus by using the Etch Blocker.
The test with the below Damascus was etched for 30 minutes in 5 minute periods.
I use my Electrolyte to etch the logo into the blade and it is powerful.
I use the 24VDC output of my power supply.
whatever works good for you, based on your years of experience.
In the following method a benefit from getting your Logo made by me
with a border like an oval will allow you to accurately boost the logo etching standout.
These steps can also be applied if you sandblast your blade for texture.
This is step one:
After your knife is finished and ready to etch
locate the general location of where you are going to place your logo.
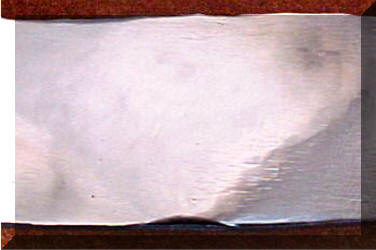
Either fine sand it (800 grit) or mirror polish it.
I mirror polished the above sample piece of Damascus.
Clean the buffing compound off.
It needs to be clean to attach the Etch Blocker.
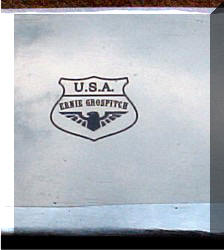
The above is a picture of mirror polished Damascus
and I took the picture.
I had problems with it catching colors
in the reflection so bear with me, it is mirror polished.
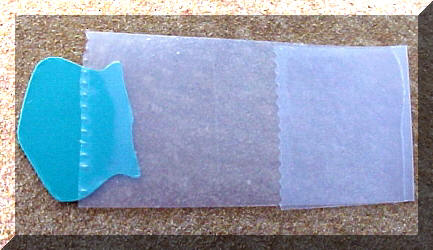
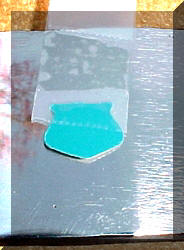
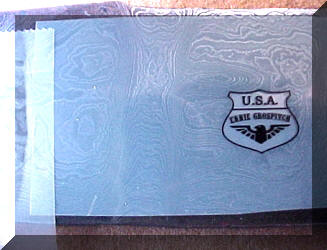
Step 2:
Place the image where you want it using the Logo Guide.
Use a small piece of Scotch tape to tape the right or left edge of the Logo Guide.
This is done so you can freely raise the opposite end of Logo Guide.
This will allow you to place the Damascus Etch Blocker in the correct/picked area of the knife.
The Logo Guide will accompany the logo stencil sheet you bought from me.
Step 3:
Take a short piece of Scotch tap and fold one end to make it easy to handle.
Place the opposite end on the Etch Blocker green side.
Step 4:
Place the Etch Blocker underneath the Logo Guide and line it up.
Then place pressure on the Scotch tape to lock the Etch Blocker in place.
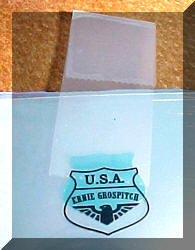
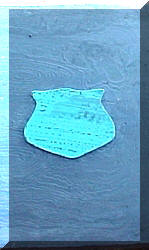
Step 5:
Take the Logo Guide off
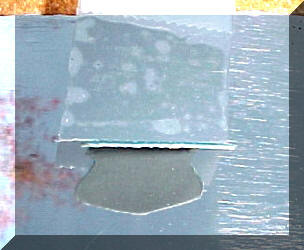
Step 6:
Raise the Etch Blocker up so you can see the white bottom.
The reflection on the left are tree limbs not rust.
It's mid-Winter...January, picture taken outside
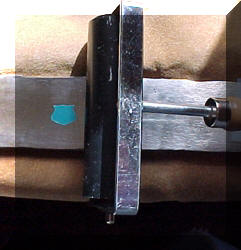
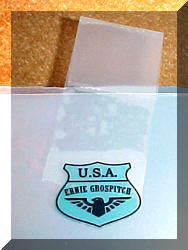
Step 7:
Remove the bottom of the Etch Blocker. Just use a sharp pointed knife like an X-acto.
Pull the coating off and let the Scotch tape that is holding it guide it into place.
Apply some down pressure with a finger.
Then use a rubber roller with down pressure to seal the Etch Blocker onto the steel.
Use good pressure because the down pressure
pushes the adhesive into any area that recedes into the blade.
That will just keep your etchant from entering underneath the logo.
The roller in the picture can be cut down in width.
You can always make your own.
Step 8:
Etch the blade steel however you prefer. T
his was done with Ferric Sulfide from the company ....Radio Shack.
The test time was 30 minutes of 5 minute etching periods.

Step 9:
Next, finish the blade with the Edge Blocker on.
I buffed the blade with the Edge Blocker on and then removed it and buffed it some more.
Finish the blade the way you normally do.
Clean it up with Acetone to remove any buffing compound.
Here again, follow your age old ways to finish the blade.
Place the Logo Guide over the blade logo etched pattern.
Be careful and place it dead on the logo.
Step 10:
Align the stencil logo underneath the logo guide.
Raise the logo guide from the left or right and tape the logo to the Damascus.
You're ready to etch your logo into the Damascus.

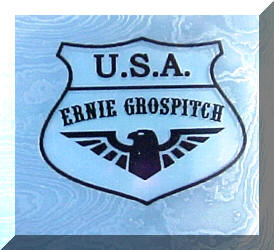
Step Final :
Etch your logo into the Damascus and finish the way you prefer.
This logo is slightly raised from the blade
due to etching the rest of the blade and you can feel it with a fingernail.
Use your own blade etching technique. This one took me a half hour ...I'm slow.
My logo etch was cleaned up with 800 grit paper.
I am not a mirror polished fan around my etched logo.
Mirror polishing over your etched logo will
tend to round the letter edges as well as polish the blade.
I use "Lemon Pledge" to maintain the steel Damascus and the other steels I use.
I also use "Lemon Pledge" to clean and polish my truck and the Wife's car....works great.
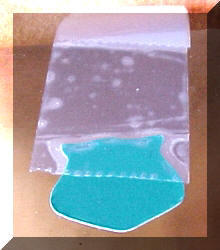
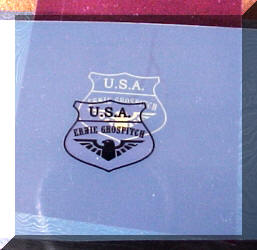
The picture on the right was an added option. I
used the finished logo on the left.
I sprayed it with Lemon Pledge.
Then I took off the Lemon Pledge with a 800 grit sandpaper.
Leave the sanded grit in the logo.
The next step I etched it for about 3 minutes to bring out the background Damascus pattern.
Just do it in short steps.
Wipe it off to check the pattern out and continue if you want it darker..
Then finally sand it lightly, in this case, with 800grit and lightly polish...That's it.
The above pictures have been magnified so any faults you find will
not be noticed by the Customer using his natural eyes...I hope.
The logo size was .500" X .615".
The font was URWWOODTypD, font size 5.43....very small.
This Damascus was Handmade by
Description
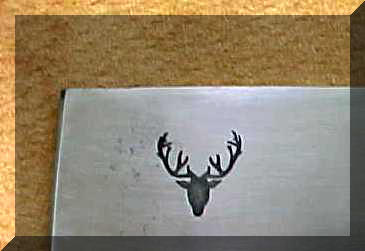
15N20 is a high nickel alloy most commonly used with 1084 or 1095
to create pattern welded or “Damascus” steel.
15N20 on it's own can be used to make a great hard work knife.
In other industries it is used for saw blades
The above picture is 15N20 stock etched with a Deer Antler stencil just to show etching
can handle that portion of the Damascus pattern
PROUDLY SERVING THE WORLD

ALABAMA, ALASKA, ARIZONA, ARKANSAS, AUSTRIA, AUSTRALIA, BELGIUM, Brazil, BULGARIA,
CALIFORNIA, CANADA, CZECH REPUBLIC, COLORADO, CONNECTICUT, Costa Rico, CROATIA.
DELAWARE, ENGLAND, FLORIDA, FRANCE, GEORGIA, GREECE,
HAWAII, ICELAND, IDAHO, ILLINOIS, INDIANA, IOWA, IRELAND, ISRAEL, JAPAN, KANSAS, KENTUCKY,
LOUISIANNA MAINE, MARYLAND, MASSACHUSETTS, MICHIGAN, MINNESOTA, MISSISSIPPI, MISSOURI, MONTANA,
NEBRASKA, NETHERLANDS, NEVADA, NEW HAMPSHIRE, NEW JERSEY, NEW MEXICO, NEW SOUTH WALES,
NEW YORK, NEW ZEALAND, NORTH CAROLINA, NOVA SCOTIA,
OHIO, OKLAHOMA, OREGON, PENNSYLVANIA, RHODE ISLAND, PORTUGAL,
SCOTLAND, SINGAPORE, SOUTH CAROLINA, SOUTH DAKOTA, SWEDEN, SWITZERLAND, THAILAND,
TASMANIA, TENNESSEE, TEXAS, UNITED KINGDOM, UTAH, VIRGINIA, WALES,
WASHINGTON, WEST VIRGINIA, WISCONSIN, and WYOMING.