
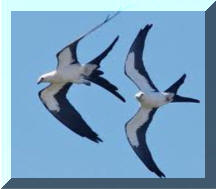
The Magnificent Swallowtail Kite

made in USA
KnifeMaker Fingerprint 1 KnifeMaker Fingerprint 2 KnifeMaker Fingerprint 3
Blue Lightning Etch Customer's Personal Stencil Addition
Blue Lightning Tips Etch your logo into Damascus Etching Power Supply
Blue Lightning Stencil: Price List
Lockback Folders Bowies page 1 Bowies page 2
Tutorials Links Stabilized Leather Moose Antler Stabilized
How to etch your Logo into your knife
HARD Felt Knife Honing Wheel Leather Stamp Custom Logo
Contact via email: shrpknife@aol.com
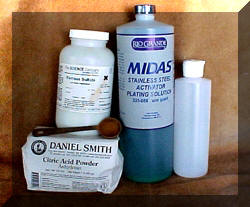
Blue Lightning
Electrolyte Solution....Home Recipe
This is what I use to test the stencils I make for Knifemakers or any
other need I may have for etching.
There are manufactured electrolytes made differently for each metal you want to electro-etch.
Those are available from any knife maker supply houses.
I do not sell the ingredients or a bottle of the Blue Lightning Electrolyte.
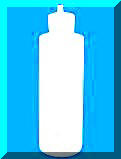
The above bottle I really like because the top is easy to open and close.
I use 1 rounded/over full teaspoon of each dry ingredient, you can vary the amounts.
Add the dry ingredients to the dry bottle. Add 2.000 " inch of Stainless Steel Activator
then fill the bottle with Distilled Water and shake.
You're ready.......to etch away !
Use standard safety precautions. The ingredient containers will explain them for you
SUPPLIES
Bottle: Uline Supply, 1-800-295-5510 Part # 8 oz. S-14501
Measuring Spoon: 1 stainless steel measuring spoon.....teaspoon size
Salt: From Grocery Store

The Science Company 1-800-372-6726, Lab Grade, Heptahydrate
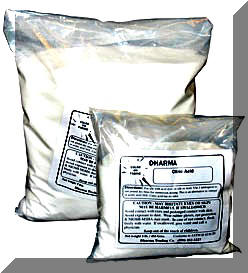
Citric Acid Powder: 1-800-542-5227, Stock # CIT 5 lbs.
If you buy several bags of Citric Acid you can add citric acid to Ferric Chloride
that you use to etch your Damascus...it helps
Citric Acid Edinburgh Etch Process Information Link......CITRIC ACID
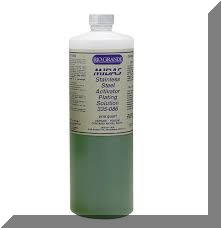
Midas Stainless Steel Activator: Rio Grande Supply, 1-800-545-6566, Part # 3350866
This will aid in electro-etching into stainless steel and Damascus
ALERT:
ALL OF THE ABOVE and BELOW INFORMATION
IS "HOMEMADE", USA
"How To" for HomeMade etching Solution
Video Link
The "KNIFEMAKER BLACKBOARD" will enable you
to artistically etch your custom made knife.
It will allow you to have a customer write his name on the blade
and you will be able to etch it into the steel.
It will allow you personally to ...SIGN...the blade you just made
with your signature...every durn time.
It will allow you to date the knife...every durn time.
It will offer you a chance to scrimshaw a tree into the blade.
THE OPTIONS ARE UNLIMITED !!!
SILVER WIRE INLAY
POWER HAMMER
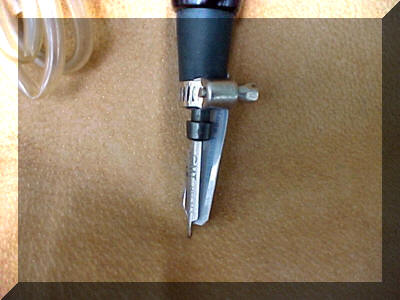
Will this work...try it !
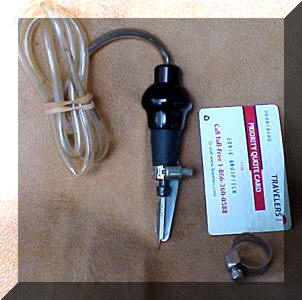
The hand parts are in the picture on the left.
The power unit is a Graver - Meister engraving machine
You will need to modify by grinding a QC Graver.
I used the Onglette point graver Grind/size it down to fit the silver wire you are using.
The plastic business card I got in the mail as an advertisement.
The are easy to scissor cut to the size you need.
The holder strap is standard.
OK, here we go....
Cut the card straight down just slightly wider than the Onglette graver.
Cut off the two bottom corners....just for comfort.
Use your connector to hold the plastic piece onto your hand unit slightly longer than the graver.
You will be able to scissor cut it off to get the depth you want.
Generally leaving .004 inches to allow the silver wire to stick up above the wood.
Next place the graver pointer on your drawing in the same place you would start
to use a hammer and hacksaw blade.
Make sure you are holding it straight up and down.
Use your lead finger to press the plastic card against the hand unit graver pointer.
It will only go down into the wood until it touches the Depth Blocker...the card.
Stop unit go to the spot or call it follow the pattern line and do the same thing.
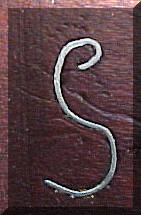
The right picture (.400" tall) is a rough practice Power Hammer example.
Better design and finish to follow
If this doesn't work....feel free to blame me.
SILVER WIRE INLAY INFORMATION
Joe Keeslar, M.S. or Allen Eldridge
The below pictures are Silver wire inlay using the standard steps
and
Stabilizing the handle as the final step.
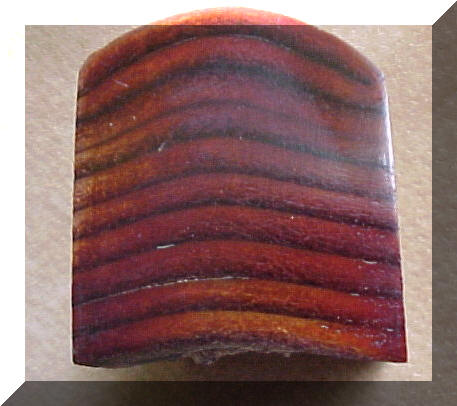
Buckeye Burl (Aesculus Californica) is native to the Western United States.
It is one of the most sought after burls by Knifemakers.
Buckeye Burl has a spectacular swirling grain pattern
with colors ranging from blue/gray to black with rust and yellar gold thrown in.
This will vary for every knife handle.
Personally it is my favorite wood knife handle material.
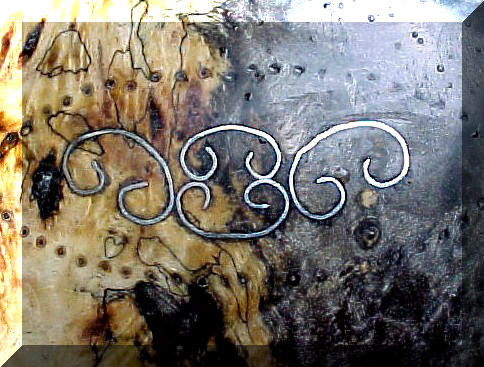
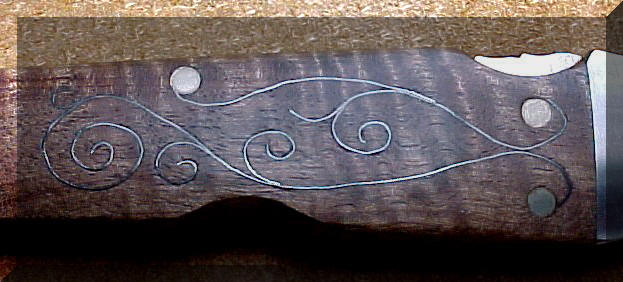
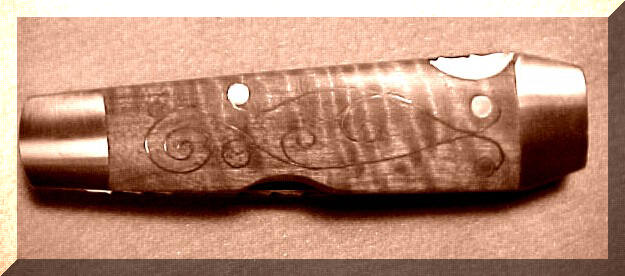
Silver Wire inlay test piece of Stabilized California Buckeye Burl
This below handle inlayed wood is very smooth with no inlay feel.
It has been polished with a loose buffing wheel, with white rouge.
This silver wire inlay was only added to the wood block to see if I could get the stabilizing job done.
The outside drill marks will house a silver rope loop.
The piece is intended to go on a leather sheath.
The stabilization process, Loctite Resinol 90C, was completed after the silver wire inlay was installed.
The inlay was not installed after the wood had been was stabilized .......
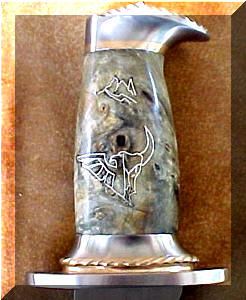
Stabilized after inlay
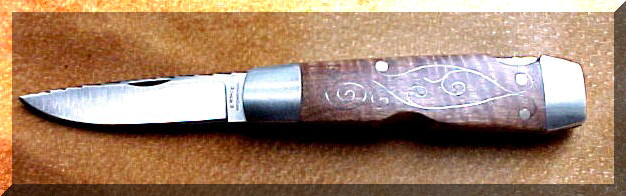
Here are some inlayed knife handles that were stabilized ( by me) after my silver wire inlay.
The below Lockback folder is the first test I made for stabilizing knife handles.
It is an ATS-34 Lockback folder handmade by me. The handle is Curly Maple.
The Silver wire inlay was done after the handle was shaped.
The Lockback was not put together yet.
Handle was stabilized and then the folder was assembled and finished.
Hand File work


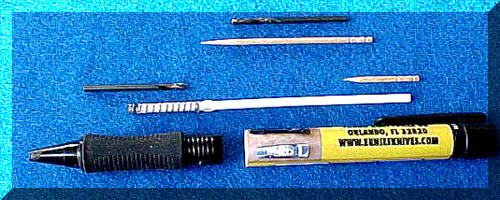
Above are the start tools for cutting the KnifeMaker BlackBoard.
The picture on the left is the modified Micro-Engraver.
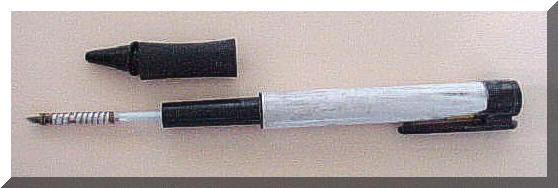
The one on the right is a modified Pen.
The Micro-Engraver is not a needed pen. It will help. Just buy one and have it standing-by.
The is a Micro Engraver made by Chicago Electric Power Tools.
Buy a round HSS burl .4mm bit. Reduce it down to about 1/2" in length.
Insert it in the Micro Engraver. Put the batteries in and.... reverse..... their polarity.
The BlackBoard writing pen on the right is made from a regular ball point pen.
Take it apart and remove the tip and blow the ink out.
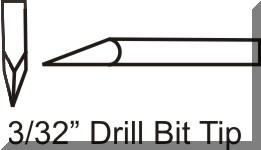
Take a 3/32" drill bit and reduce the length to about 1 inch by grinding away the cutting tip.
Don't grind it all off leave about 1/4".
Taper the tip of the drill bit and insert it into the ink supply tube.
In the rear end of the ink tube fit a toothpick to slightly increase the tube diameter.
This will help hold the tip in place.
Grind the tip. Deburr the grind...one shot on the deburring shop wheel or use fine sandpaper.
Then write with the round portion down. Writing does not require a lot of pressure.

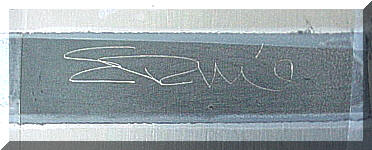
Pick the area you want to use for the person to sign the knife.
Clean it of any oil or wax. Use the surface cleaner listed in the supplies below.
Put some masking tape around the area. Add the "BlackBoard" solution.
Make sure it is black and the steel does not show through it. Pull the tape off.
This will give the person signing a border to sign into.
The marking pen should be used with the round portion down.
Explain the usage of your marking pen.
The person can sign the covered area with minor speed and pressure.
Make sure that the letters are clean and all you see is steel.
Then etch the signature into the blade.
The "BlackBoard" solution can then be removed easily with Acetone.
Because of the Acetone usage writing his name at the Show
and you etching the signature creates Hazard problems.
This may be an out of Show only option.
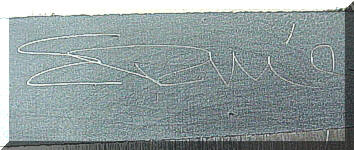
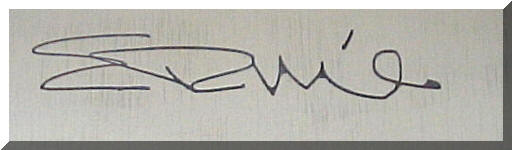
The bottom image is my scribble using my modified pen. It was a flash signature.
The solution is made with one part lacquer primer with 3 parts acetone.
The solution can easily be modified to suit you by increasing or reducing the acetone used.
Supplies: The supplies are 5 Star Extreme Autobody products.
The cleaner is #5902 Final Wipe Wax and Grease Remover.
The "BlackBoard" is Hot Rod Black Acrylic Lacquer Primer # 5403.
In Orlando, Florida the Supplier is Ben's Paint Supply 1- 407-428-0140
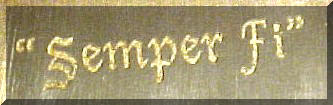

"Bonanza Gold" Inlay
This "Bonanza Gold" looks like real gold.
To inlay it into your logo just follow these steps.
Step #1:
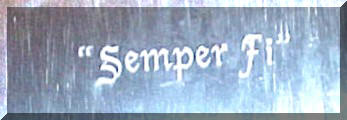
Etch your logo into your knife blade.
Try to leave it as free of carbon as you can. Do not use the AC step.
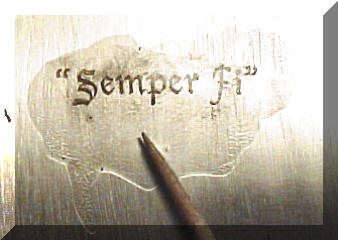
Step #2:
Clean the logo. I use Comet Scouring Powder with a toothbrush. Rinse and dry.
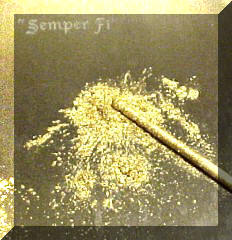
Step # 3:
Place some "Gold" next to your logo or off the knife entirely.
I use a toothpick with the grooved top to get the Gold out of the bottle.
You will need very little.
Step #4:
Next drop a few drops of the liquid base into the "Gold" and
here again use a toothpick to mix it up.
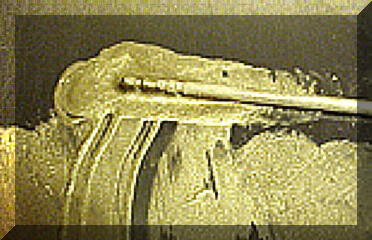
Step# 5:
Place the "Gold" mixture over the logo.
Work it around so there are no air traps in the logo.
Then let it dry, my guess is 30 minutes.
I place it under my 60 watt desk light until it is completely dry.
After it is completely dry sand the excess off the logo.
After sanding clean it with Comet cleanser and a toothbrush.
You will feel indentions of the logo with your finger nails.
Step #6: Apply the "Gold" again and let it dry and sand again.
It will help flatten the Gold inlay and it will help it feel smooth.
Supplies:
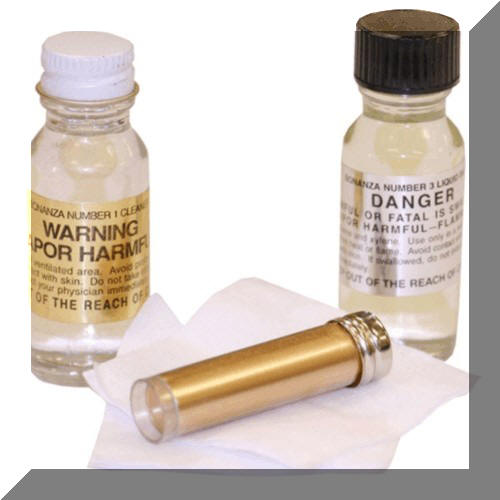
" Forster Bonanza Gold" Brushing Inlay Kit
from Brownell's Gun Supply or Forster Products.
Part #319-056-oooWB....Mfr Part Number: 001001
You can use the kit to inlay any other powdered metals
You can use the Clear Lacquer from Rio Grande Jewelers Supply
part number 335-149 for doing the final smoothing step.
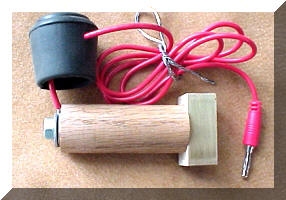
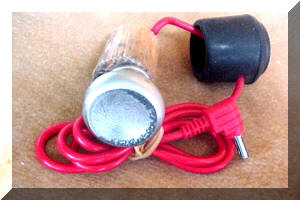
POWER SUPPLY HAND PIECE
This Hand Marker will do the job and last you for years maybe a decade or two.
An advantage is if you want to change the size you can easily do it.
Make the tip section 1/4" larger than the logo you are etching into your knife.
The size allows you to firmly press down evenly across the entire logo.
There are many other Hand Markers to buy and use....make your own
This one will be custom made by you for you.
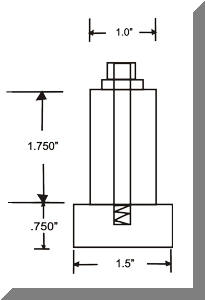


Step one Plus:
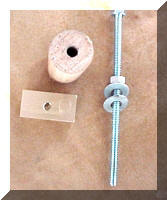
Assemble supplies. Felt from Jo-Ann Fabrics, 1/4 20 X 5"
stainless steel bolt from Home Depot, 1" round Oak stock, from Home Depot,
1" Chair leg pad from Home Depot, Brass Bar .750" X .750" X 1.5" from Sheffield's Knife Supply,
Rubber band from Office Max. The Marker brass is that size because I test various size stencils.
Cut Oak stock to desired length. Drill 1/4" hole through center of Oak stock.
Drill and tap brass bar and do not go through the bar.
Place two washers and a 1/4 20 nut on the bolt.
Pass the bolt through the Oak Stock and tighten it firmly.
Take your banana plug lead wire and tin it with solder.
Drill the Chair leg cup just below the hard tip section with a .125" drill bit.
Do not run the bit in and out.
You want some rubber fiber left in the hole to better hold the wire,
bend the wire tip to go around the bolt and place it in between
the washers and firmly tighten the nut against the Oak stock.
Hack saw the top of the bolt off and clean it up with your belt grinder.
Place the cup over the nut, washers and wire.
Press it firmly against a hard surface to make sure it's all the way down.
Shape the wood handle as you prefer.
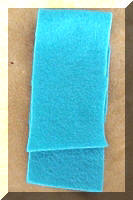
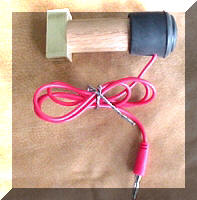
Take a long strip of Polyester (Re-cycled) felt and fold it twice.
For stencils that have a large amount of etched area triple fold it.
Place it over the brass tip.
Fasten with a rubber band. You're ready to etch.
To clean brass after etching just remove the felt and
scrape/sand the end of the brass bar across a piece of
220 grit sandpaper that is firmly flat supported.
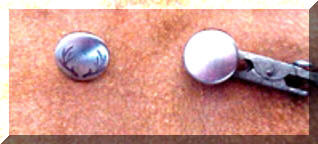
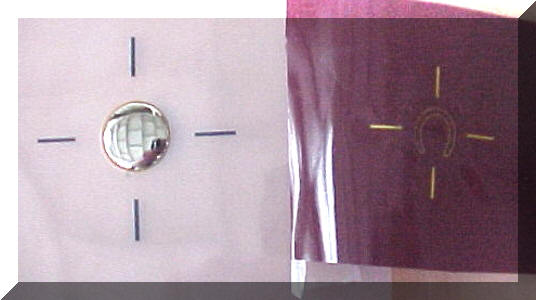
ETCH LEATHER RIVETS and FASTNERS
This one pictured below is a Segma snap (Nickel/Brass).
The one on the left has been etched.
The one on the right is being held by the alligator clip ready to etch.
Pick the pattern you want to etch from a standard stencil material
that you use to etch your Logo into your knife.
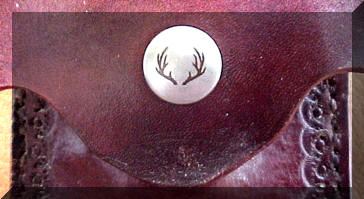
I made this one of Deer antlers because it is going on a Bull Nose style skinner sheath.
Follow the same etching steps. These snaps are plated with nickel.
When you etch you will remove the nickel and expose the brass.
his will increase the visibility of your pattern.
Result on sheath pictured below.
The snap has been used on my Bull Nose Skinner carry sheath...
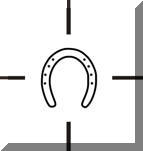
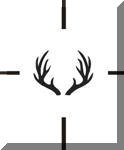
Below are images that can be etched into the Snap Button.
Number one are Initials (your pick),
number two is the Lucky Horseshoe. number three is Deer Antlers
I will make these with guide lines to help center the image on the Snap Fastener.
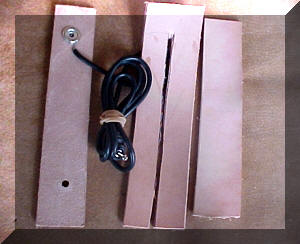
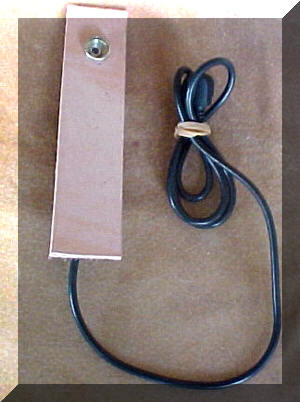
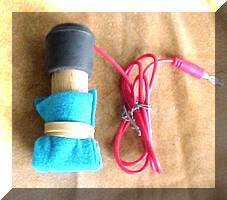
Etching hand unit for etching the leather fasteners.
The Left picture is the hand unit that is covered with
the two layers of felt and has the electrolyte added to it.
The metal front is a stainless steel cabinet door knob from Home Depot
This I made the same as the hand piece tutorial above on this page.
The door knob needs to be ground concave , about a 2 inch diameter contact wheel
on a 2" X 72" belt grinder can be used.
if you need more information call 1-407-568-5438.
That is done so the pads can be evenly pressed over the entire fastener top.
The middle picture is the Clip on section that I made for the other power supply connection.
All it does is snap onto the fastener just like normal closing.
The bottom picture shows a Guide for placing the Logo on the fastener top in the center.
How does it Work? The Guide comes with the stencil you order.
You scotch tape the stencil to the Guide.
You place the Guide over the fastener and etch the pattern into the fastener.
The Guide helps you place the stencil on the center of the fastener.
Next just wax the fastener with some paste wax
I use. I use "Crystal Clear" with imported
Carnauba, I have added more Carnauba to the 1lb can.
I bought it at the local Wood Shop store.
The plated fasteners will etch as will the brass.
Knife Logo Etched into Watch Band
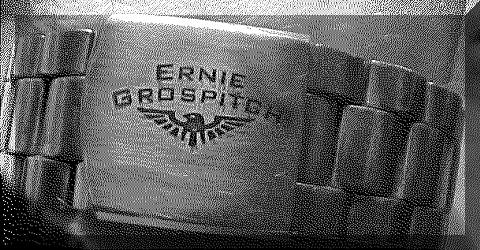
I etched my Logo into my Stainless Steel watch band
using standard etch steps.
You could easily add your Home or Emergency telephone number
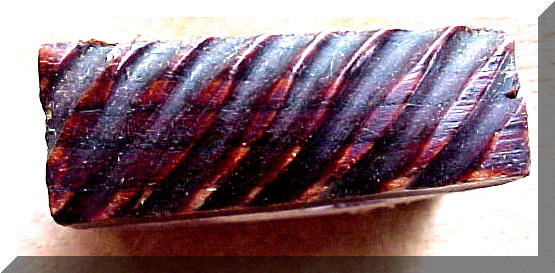
STABILIZED RAW CLOTH
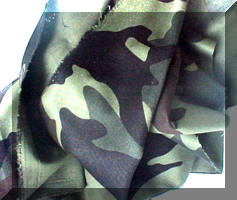
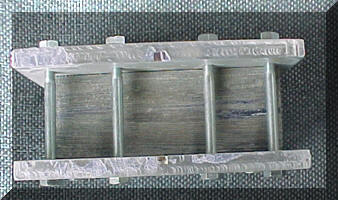
I started with 100% Cotton Camouflage Cloth to experiment with...first time
The picture on the left is the raw cloth.
The center picture is the rig I made to squeeze
and hold the cloth together while I stabilized it.
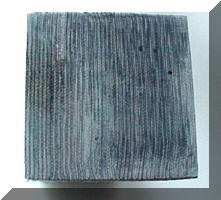
The picture on the right is the end of the block.
You can see the cloth layers.
The size was 2" x 2" X 5".
The result is very similar to Canvas Micarta. Why do this ??
If you have a Customer that wants the handle
made of the fatigues He/She retired in here
is the opportunity to make the entire knife handle with it.
If a Dad passes away his Son or Daughter may want a knife made from his personal
wearing apparel material so they can have Him with them constantly....Forever !!
A pocket knife fits here perfectly.
Uses a small amount of cloth to make the handle slabs.
STABILIZED LEATHER KNIFE HANDLE
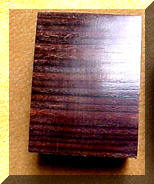

For the Leather handle material I used left over pieces of
vegetable tanned leather, from Weaver Leather.
The pieces were 1.5" X 2.0".
I stacked them on a 3/8" eye bolt holder and squeezed them together
and ran it through my stabilizing system.
After the stabilization I sanded it down to 400 grit.
The piece on the right I did some quick rough file work (round file only)
then dyed and polished it just to see it would look and be OK...it qualifies.
I stained it with Light Brown dye and polished it
with a white rouge buffing wheel.
The large bottom block is the same leather but is larger....1.750" X 2.750" X 5.00".
I made this leather block to be used as a stabilized leather knife handle.
It will be shaped the same way as you would use for a wood knife handle.
The very small piece on top is stabilized leather perhaps for use as a fob.
The one on the right is Leather Stabilized block #2.
I milled it rectangle. Openings would, more than likely,
be removed with more leather removal.
I use the heat/pressure cure Wood Stabilizing steps
(Plus extra secret steps for leather).
FOR MORE INFORMATION ON LEATHER
VISIT THIS PAGE.
SIGNATURES
Link to PDF for LOCTITE System for Stabilizing
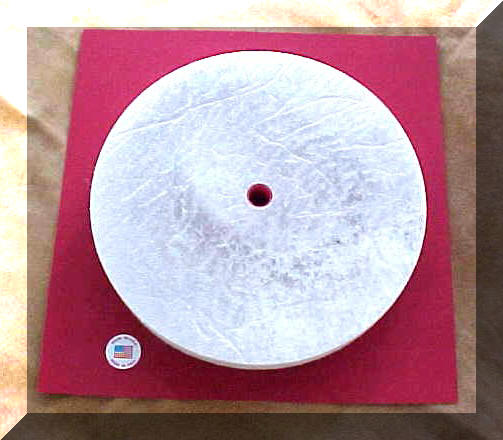
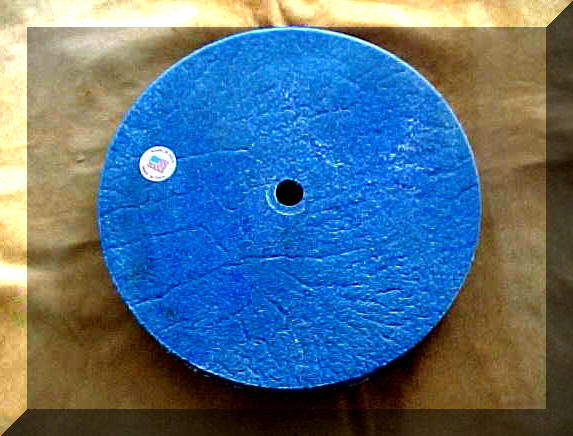
HARD FELT STROPING/HONING WHEEL
HomeMade / HandMade
For Final Step in Sharpening Knives
Hard Felt Stroping/Honing Wheel
All Parts/ingredients and the Knifemaker were/are made in the
USA
PROUDLY SERVING THE WORLD

ALABAMA, ALASKA, ARIZONA, ARKANSAS, AUSTRIA, AUSTRALIA, BELGIUM, Brazil, BULGARIA,
CALIFORNIA, CANADA, CZECH REPUBLIC, COLORADO, CONNECTICUT, Costa Rico, CROATIA.
DELAWARE, ENGLAND, FLORIDA, FRANCE, GEORGIA, GREECE,
HAWAII, ICELAND, IDAHO, ILLINOIS, INDIANA, IOWA, IRELAND, ISRAEL, JAPAN, KANSAS, KENTUCKY,
LOUISIANNA MAINE, MARYLAND, MASSACHUSETTS, MICHIGAN, MINNESOTA, MISSISSIPPI, MISSOURI, MONTANA,
NEBRASKA, NETHERLANDS, NEVADA, NEW HAMPSHIRE, NEW JERSEY, NEW MEXICO, NEW SOUTH WALES,
NEW YORK, NEW ZEALAND, NORTH CAROLINA, NOVA SCOTIA,
OHIO, OKLAHOMA, OREGON, PENNSYLVANIA, RHODE ISLAND, PORTUGAL,
SCOTLAND, SINGAPORE, SOUTH CAROLINA, SOUTH DAKOTA, SWEDEN, SWITZERLAND, THAILAND,
TASMANIA, TENNESSEE, TEXAS, UNITED KINGDOM, UTAH, VIRGINIA, WALES,
WASHINGTON, WEST VIRGINIA, WISCONSIN, and WYOMING.